Just like any hackintosh installation, Mac OS VMs will have trouble logging into existing Apple accounts without some adjustment. If you jump the gun and attempt to log in without tweaking some things, you risk a temporary Apple ID ban.
Consider supporting us if you value independent tech news and research. This site will always be free of ads and sponsored content.
Fixing Apple ID, Simply
We’ve covered the most basic elements of this process in part 1 of our Mac OS guide, but there’s some other measures you probably want to take to make absolutely sure you aren’t putting your account at risk. Once you have a basic working vm installed, the next steps are fairly simple. There’s two ways to go about this. The first is to manually set lots of information about your device in your config.plistthat will make your VM less detectable.
We’ve provided a minimally edited config.plist, but you’ll have to spend some time looking up different values for different models if you don’t want that particular mac model to show up. The overall syntax structure will be largely the same. Adding entries to your plist necessarily means there’s more things that can go wrong long term, but the risk here is probably acceptable given the benefits of working Apple ID.
Make a backup of your ESP.qcow2 image (copy and rename it) and then boot your VM.
From there, boot into the VM, open a terminal and run sudo diskutil list. The 256MB disk is the one you want. Mount the smaller, FAT partition by running sudo diskutil mount diskXsY (where X and Y are the disk and partition numbers)
Navigate to the clover folder, and copy/rename the config.plist file. download the new one above, paste it into the folder and rename it config.plist. Make sure to edit the resolution value to be the same as what you have set in your old plist by changing the <string>1920x1080</string> under the Screen resolution key before rebooting. Carry over any edits from the old file you want to keep as well.
If you did this in addition to setting your uuid and nic mac address as described in part 1 of our mac OS guide, you should be good to go after a reboot.
Using Clover Configurator
Disclaimer: this tool may break your Mac OS installation or configure your plist in a way that causes problems later. Please be careful when using it and make sure to back up everything before proceeding
Clover configurator is a tool that can automatically populate your SMBIOS values to make the VM look more “real.” Back up your ESP.qcow2 first, then download Clover Configurator and drag it into your Apps folder. You may have to allow it to run in the System Preferences > Privacy & Security menu.
You can use Clover Configurator to mount your ESP from the GUI, using the Mount EFI menu in the tools section of the application:
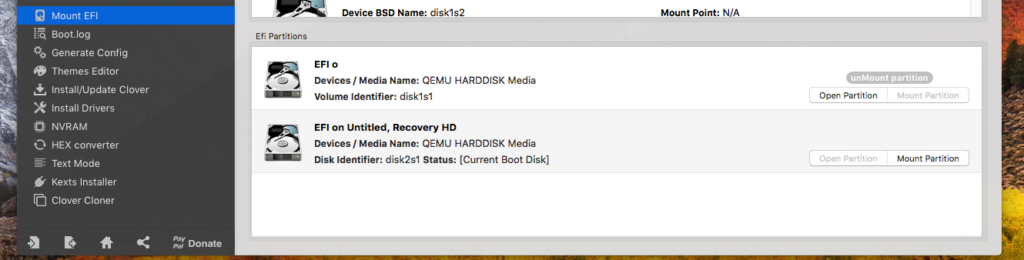
Simply mount the first option by clicking “mount partition.”
from here, click the “load” button in the bottom left, navigate to the ESP clover folder, and select config.plist.
After that, click the SMBIOS tab and use the little drop-down menu on the right to select a mac model (we used iMac 10,1)
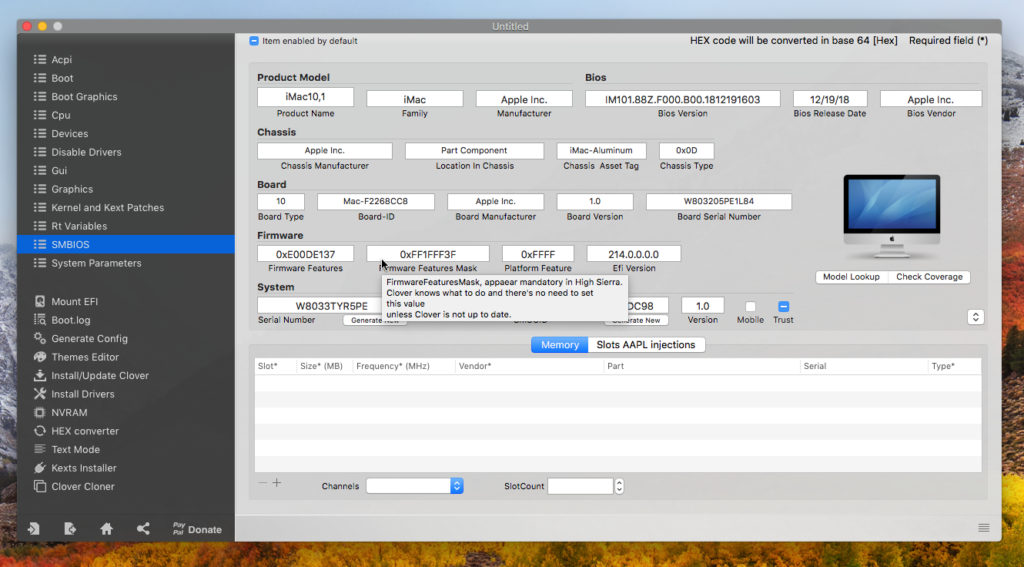
Now, all you need to do is click save, confirm overwriting the old plist, and reboot.
Consider Supporting us on Patreon if you like our work and want a say in what we cover and access to early content. We provide RSS feeds as well as regular updates on Twitter if you want to be the first to know about the next part in this series or other projects we’re working on. If you need help or have questions about any of our articles, you can find us on our Discord.
Images Via Pixabay