I’ve found that a lot of the time, people are so eager to get into their passthrough VMs once they finish setup, that they often forget to stop and make sure everything is working correctly.
Read Also: Easy VFIO under $1,000
Hitting the ground running like this can make maintenance and optimization hard later, so I’ve put together a few tips for those just getting into their fresh Gaming VM. These tips aren’t life altering modifications but they can make your GPU passthrough setup easier to use, in the long term.
Create A Separate Game Drive
This is more “before you switch” type advice, but it can’t hurt. Pass through a dedicated drive for your Steam library and other games, separate from your VM’s boot drive.
This makes things like windows update and data corruption on the guest drive much less painful, and you will also be able to transition to and from a bare metal gaming setup if need be. In addition, when the guest is off, the hard drive is available for host use.
Expanding on the point made above, make sure to use a virtual drive image for your windows installation. This idea may be more contentious than the first, but there’s a lot of good reasons to go with an image for the boot drive over a dedicated volume.
You might be asking yourself: “why not have it on a physical drive so you can dual boot?” — and the answers, while not immediately apparent, are many:
- easier backups and restores.
- cloning and transitions to new hardware are easier
- snapshots become an option, enabling rollbacks after failed updates or reconfiguration
If you’re concerned about boot times, you can always store the image on fast SSD media and you’ll hardly notice a difference. Recommended size is 40-60 gigabytes depending on what you store in it.
Back Up Your ‘Setup’ Files
On the topic of starting over, I suggest you make a folder with resources for setting up your VM from scratch again, should the first line of defense prove inadequate. Steam and device drivers are the first ones that come to mind, but others might include discord, gamepad drivers, or license keys depending on your use case.
It also doesn’t hurt to back that folder up onto a usb drive or a network share. This is especially useful for slow connections or when you’ve forgotten to switch your NIC to VirtIO mode.
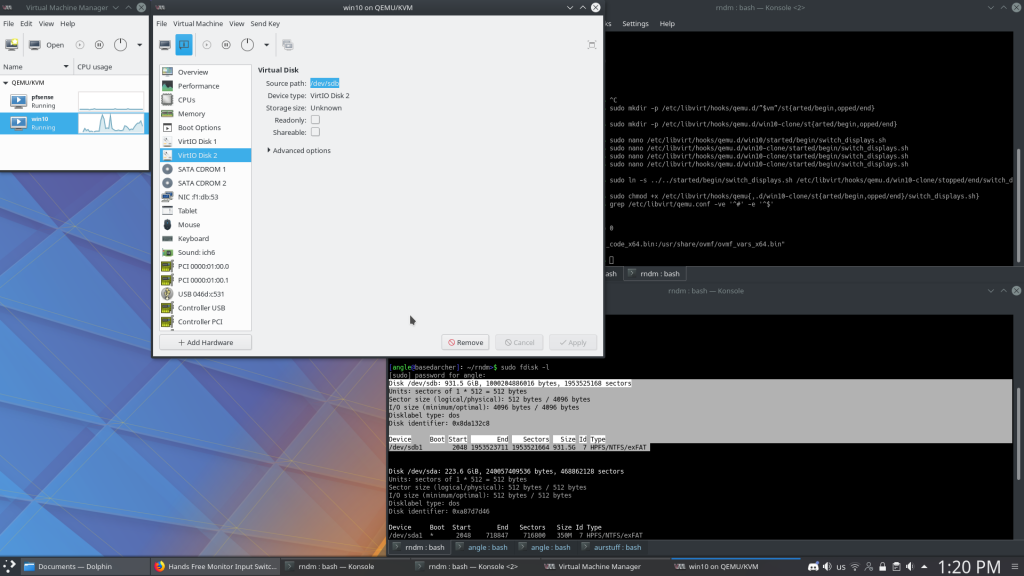
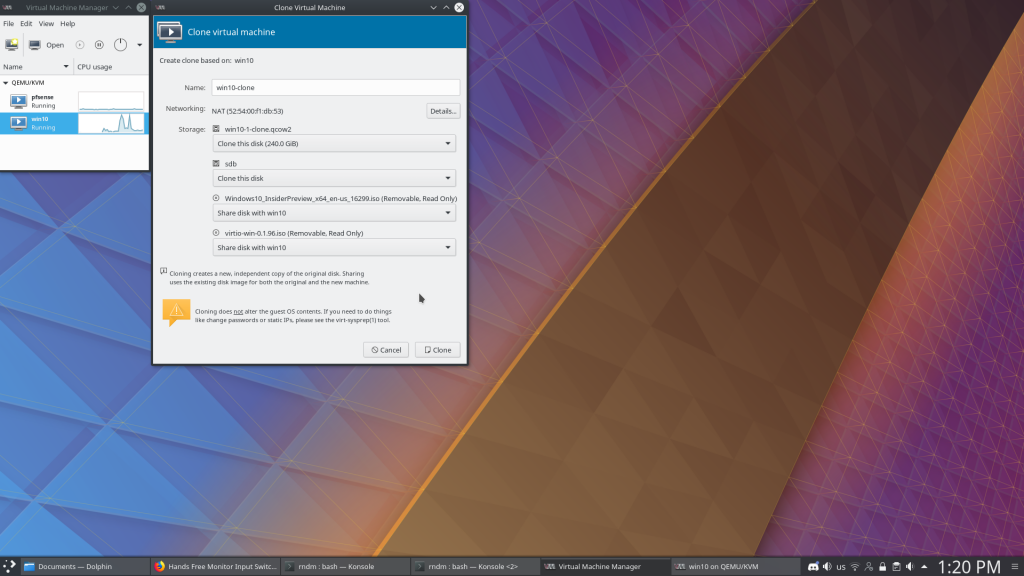
Clone Your Fresh Gaming VM
Emergency situations, like your virtual machine becoming unbootable or the image becoming corrupt, are more common than most would like them to be, and can be tedious to recover from. Luckily, virt-manager comes built-in with a clone feature in case all of your other prep fails you.
Although backups/snapshots are recommended, it doesn’t hurt to have a clone of the virtual machine in case something goes really, really, wrong. Restoring from a “known working” state is easy enough and doesn’t cost too much in terms of hard drive space.
Back up Your Host Configuration Files
We’ve covered what to do in case of guest failure, but sometimes the problem comes from the host. I’m sure you’ve heard this one before, but it continues to be one of the best tips I can recommend.
When setting up GPU passthrough you edited at least 4 files, and saving the fresh and last known working copies (of e.g. mkinitcpio.conf, qemu.conf and vfio.conf) is going to save your bacon if you change something down the road and it causes problems.
Buy Some Purpose-Built Hardware
The unfortunate reality of VFIO is that there’s a noticeable gulf between “working” and “useable” or “convenient” in a lot of cases. Some things can be fixed in software, but for fresh faces with fresh VMs, there’s no substitute for a little hardware to help smooth the transition from baremetal to VM gaming.
One of the best investments a new VFIO user can make is in a hardware KVM switch — hours of configuration and dealing with latency, corner cases and incompatibility can be avoided with these inexpensive, reliable devices. We cover how to set one of these up here.
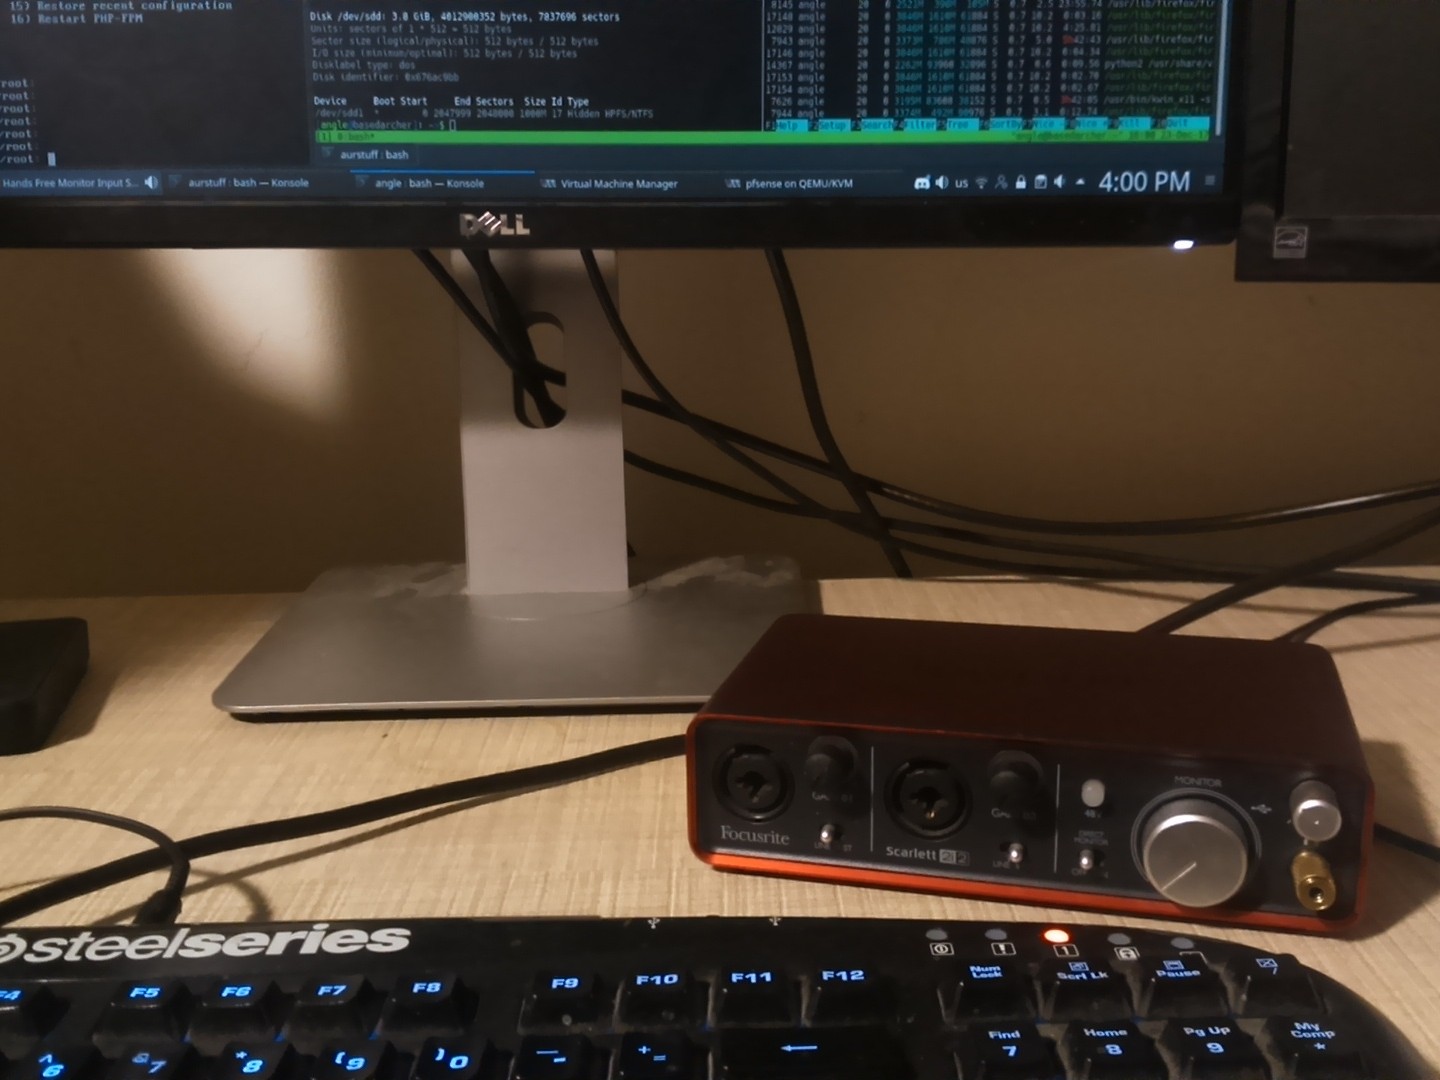
Another community favorite comes in the form of USB sound interfaces — they’re inexpensive, plug and play, and serve as a drop in workaround for Qemu’s inadequate audio virtualization support. They range from as little as eighty cents to hundreds of dollars, but they make good VM audio as simple as plugging in a USB device.
Wrap-up
Like I said at the beginning, none of these enhancements are life changing, but they can all increase the practicality and ease of use for your VFIO experience. In aggregate, though they should make your gaming VM experience a lot better — especially in the long term.
Which tip or tips did you find most helpful? Leave your answers in the comments below
Discuss other minor tweaks that make a big difference on our Discord!