Not everyone has direct access to a wired connection, and many networking features in libvirt assume the user does. With an old wireless router and a bit of know-how, though, you can work around the limitations of your wireless adapter.
Consider supporting us if you value independent tech news and research. This site will always be free of ads and sponsored content.
While this method isn’t ideal, it does give you more flexibility in your VM networking if you can’t run a wired connection to your PC. If this isn’t your situation, this guide may not be very helpful to you.
Client Bridged Mode Bridges the Gap
All you need for this tutorial is a spare wireless router that supports Client Bridged mode.
This feature is relatively common nowadays, and flashable to many older models of Linksys router using DD-WRT or other aftermarket firmware. Client Bridged Mode essentially turns the router into a reverse Wireless AP, connecting to your main wireless network and bridging its onboard ethernet ports to that connection.
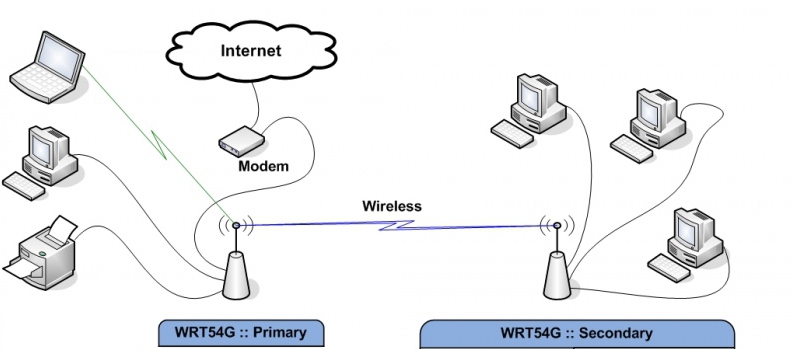
Once properly configured, all you have to do is plug your Client Bridge into your PC via ethernet. Of course, all your PC sees is an ethernet connection, so while it seems counter-intuitive, it will let you use any feature of libvirt networking (or wired networking in general) on a wireless connection. You can even use this technique to trunk/failover your wi-fi, too, if you want.
Client Bridged Setup
In this tutorial we will cover setup on DD-WRT routers, because it’s the most popular firmware and many commercial products are based on it (or tomato) so the process will be somewhat similar on other devices.
You can also flash DD-WRT to a wide range of devices, but that process and outlining hardware that supports Client Bridged Mode is out of the scope of this tutorial. Do some googling if you’re not sure.
First, get your default gateway address for your wireless access point by running ip route | grep default. This will usually just be the address of the router, but isn’t in all cases. I decided to use my phone as the gateway to demonstrate this method’s flexibility, so in my case my gateway address looks like this:
[tyson@localhost ~]$ ip route | grep default
default via 172.28.172.1 dev enp0s31f6 proto dhcp metric 100
Next, do a hard reset on your DD-WRT router (not your main access point,) connect it to your VM host, and log into the web interface (usually 192.168.1.1, but this varies by model so look up your specific device’s default address.) — set a user name and password for the router, unless you want anyone to be able to change your settings after the fact.
From here, go to Setup > Basic Setup, give the router a name, Set the WAN connection type to “disabled.” Disable the DHCP Server, make sure the time zone is correct, and optionally check “Assign WAN Port to Switch” if you want an extra ethernet port. Hit “Save.”
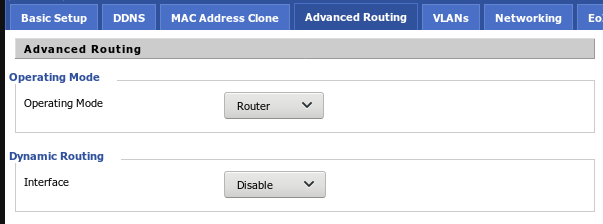
Then, go to Setup > Advanced Routing and Set the Operating mode to Router and hit Save. Make sure not to hit “Apply Settings” at any point in this process unless directed.
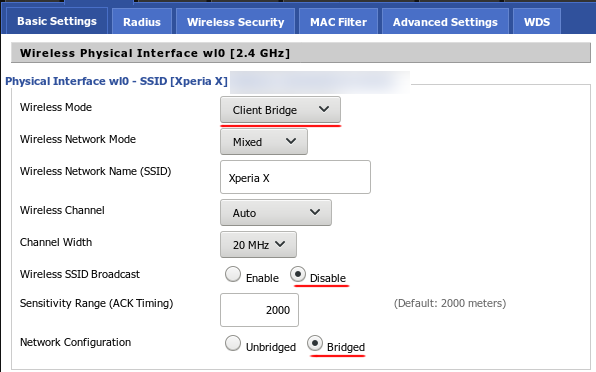
Next, navigate to Wireless > Basic Settings, and change the Mode to Client Bridge, and enter the SSID of your Access Point’s wireless network (Case, Spaces etc. should match exactly.)
Disable SSID broadcast, and change the network configuration to bridged:
If you live in an area with densely packed wi-fi, you may want to manually set your channel width and wireless channel manually to be the same on both the access point on the bridge, too. Hit Save.
Go to Wireless > Advanced Settings and change the Authentication Mode to “Shared Key” and hit Save.

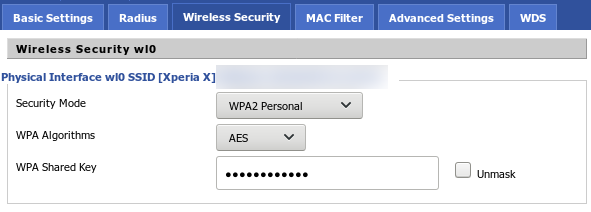
Once you’ve done that, go to Wireless > Wireless Security and set the security settings to exactly match your access point’s (again, case sensitivity, punctuation etc. matters for the preshared key.) Hit Save.
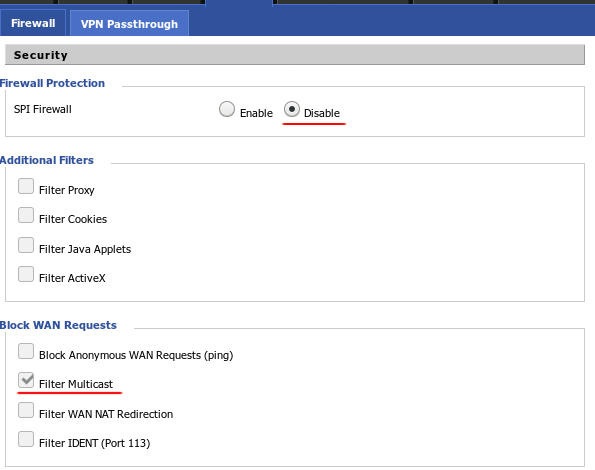
Navigate to Security > Firewall, uncheck all options under “Block WAN Requests” except Filter Multicast, then disable the SPI firewall:
Hit save, and go back to Setup > Basic Setup. Change your Gateway IP to match your Gateway Address (output of ip route | grep default) and assign your Client bridge its own address in the “Local IP Address” field, on the same subnet (match the numbers except the last value. I used 9, for example, but it can be any value from 2-255):
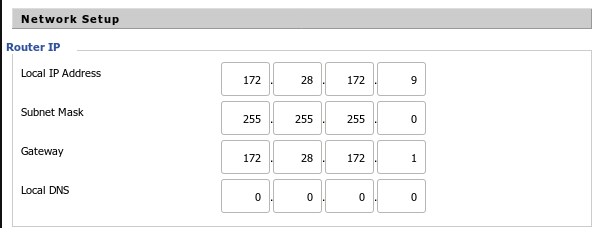
This new address will become the IP you use to access the router if you need to make changes, so be sure to record what you change it to.
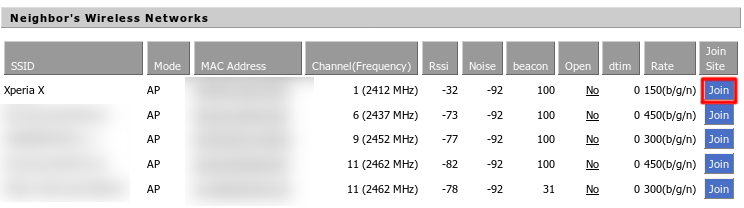
Hit Save, navigate to Status > Wireless, and click “Site Survey.” Allow pop-ups if your browser gives you a warning.
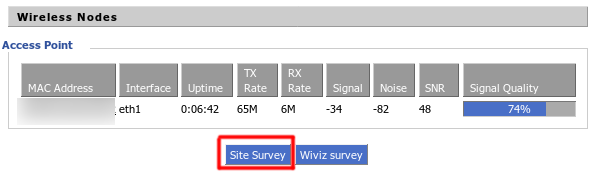
In the next dialog, connect to your AP’s network by pressing “Join”
Now verify your changes one more time, and hit Save, then Apply Settings. You will have to enter the new local IP you set for the router to get back into the web interface.
Physically disconnect and reconnect the ethernet cable from your PC if for whatever reason the new IP address doesn’t work after a few refreshes. You should have a working bridge with internet access if you followed the steps correctly.
Wrap-Up
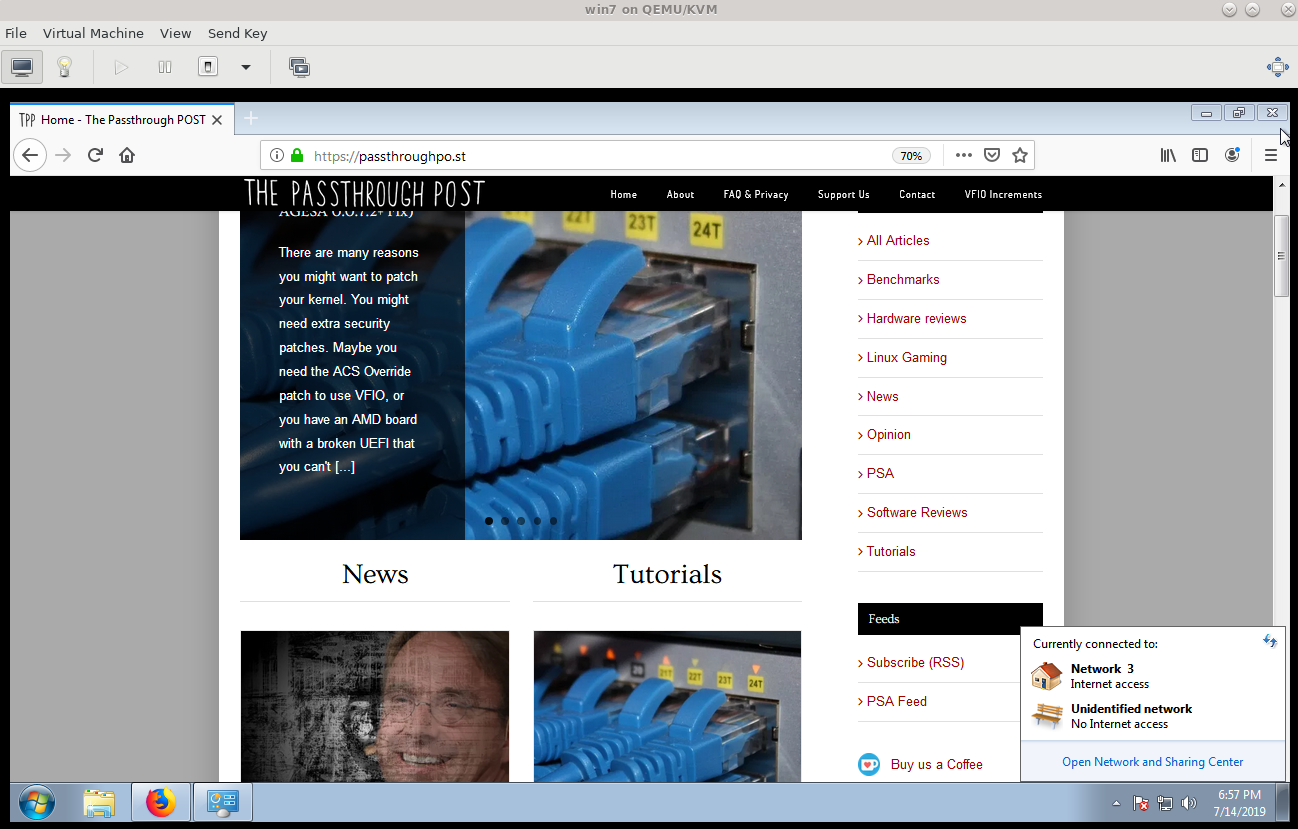
Things are pretty simple once you have this working. Just set your NIC to Host device [NIC NAME]: macvtap in virt manager instead of NAT, and fire up the guest system to confirm you have a working connection:
If you need guest <> host communication, double click “Qemu/KVM” in the main virt-manager window, hit the virtual network tab, add a new connection with default properties, and the type set to isolated.
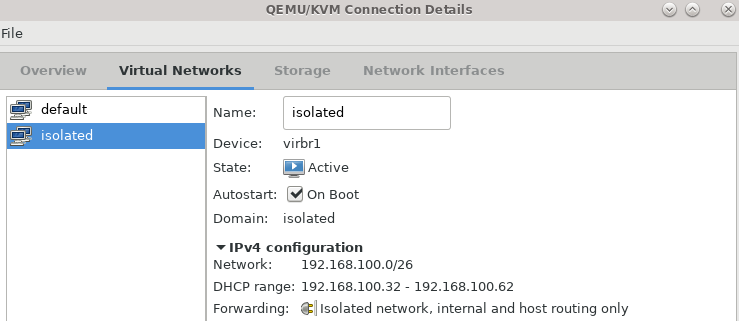
Add a second NIC in your guest VM and set the connection type to the isolated network:

And that should let the guest see the host on the network and vice versa.
Why Bother with Bridged VM Networking?
NAT might be fine for most people on wireless connections, but it hides the guest from the rest of the devices on the the network, which can be problematic for certain use cases. Since bridged networking is either impossible or extremely difficult to get up and running on a wireless adapter, it excludes anyone that can’t run a wired connection to their access point, or doesn’t have physical access to it in the first place.
This method re-enables that capability using a dirty workaround and some spare hardware, but it does so without a lot of trouble and messing around with linux wireless networking tools, which are famously finnicky and unreliable for advanced use cases. It makes sense for people who want to access e.g. a NAS or networked printer from a VM, but can’t wire their host into the network directly.
It also has the advantage of making other devices on the client bridge visible without additional wireless overhead, as they can communicate directly with one another on the switch. You could, for example, have your host machine and a NAS in one room, and your server, printer, work PC etc. in another and not have to worry about congesting the network when you access the NAS from your guests, as they’re on the same switch.
You can also use this technique in emergencies where your main AP stops working, or if your landline connection goes down (I used a tethered smartphone in this tutorial) and retain VM connectivity on another wireless network.
Consider Supporting us on Patreon if you like our work and want a say in what we cover and access to early content. We provide RSS feeds as well as regular updates on Twitter if you want to be the first to know about the next part in this series or other projects we’re working on. If you need help or have questions about any of our articles, you can find us on our Discord.
Images Via Pixabay, DD-WRT Wiki, Tyson O’Ham.